Improving the little things
In this blog post, you’ll learn which small changes you can do for your Flutter app, in order to create a better experience for your users. We’re focussing on Flutter apps for Android and iOS.
Acoustic and haptic feedback for a better UX
Flutter has various APIs to enrich the UX of your app with haptic or acoustic feedback.
Let’s start with HapticFeedback. As you might have guessed, it simply vibrates the device. Its usage is pretty straight forward, as seen in the code snippet below.
HapticFeedback.lightImpact();
HapticFeedback.mediumImpact();
HapticFeedback.heavyImpact();
HapticFeedback.selectionClick();
HapticFeedback.vibrate();
See this tweet for a perfect example of how to make use of it.
At @visible_health we also have this little tooltip when dragging across the bars in the plot which has very light haptic feedback on each entry, feels kinda nice pic.twitter.com/SbzH1FlaGt
— Dominik Roszkowski (@OrestesGaolin) March 6, 2023
Then there’s the SystemSound API, which adds acoustic feedback. Please be aware that it’s just partly supported depending on the platform.
// SystemSoundType.alert is only supported on desktop platforms
SystemSound.play(SystemSoundType.alert);
SystemSound.play(SystemSoundType.click);
Last but not least, there’s the Feedback API, which is for adding semantic feedback. It also satisfies various accessibility concerns. See the below code snippet for an example.
class WidgetWithWrappedHandler extends StatelessWidget {
  const WidgetWithWrappedHandler({super.key});

  @override
  Widget build(BuildContext context) {
    return GestureDetector(
      onTap: Feedback.wrapForTap(_onTapHandler, context),
      onLongPress: Feedback.wrapForLongPress(_onLongPressHandler, context),
      child: const Text('X'),
    );
  }

  void _onTapHandler() {
    // Respond to tap.
  }

  void _onLongPressHandler() {
    // Respond to long press.
  }
}
Enable edge to edge mode on Android
The first tip is to enable the so-called edge to edge mode for Android.
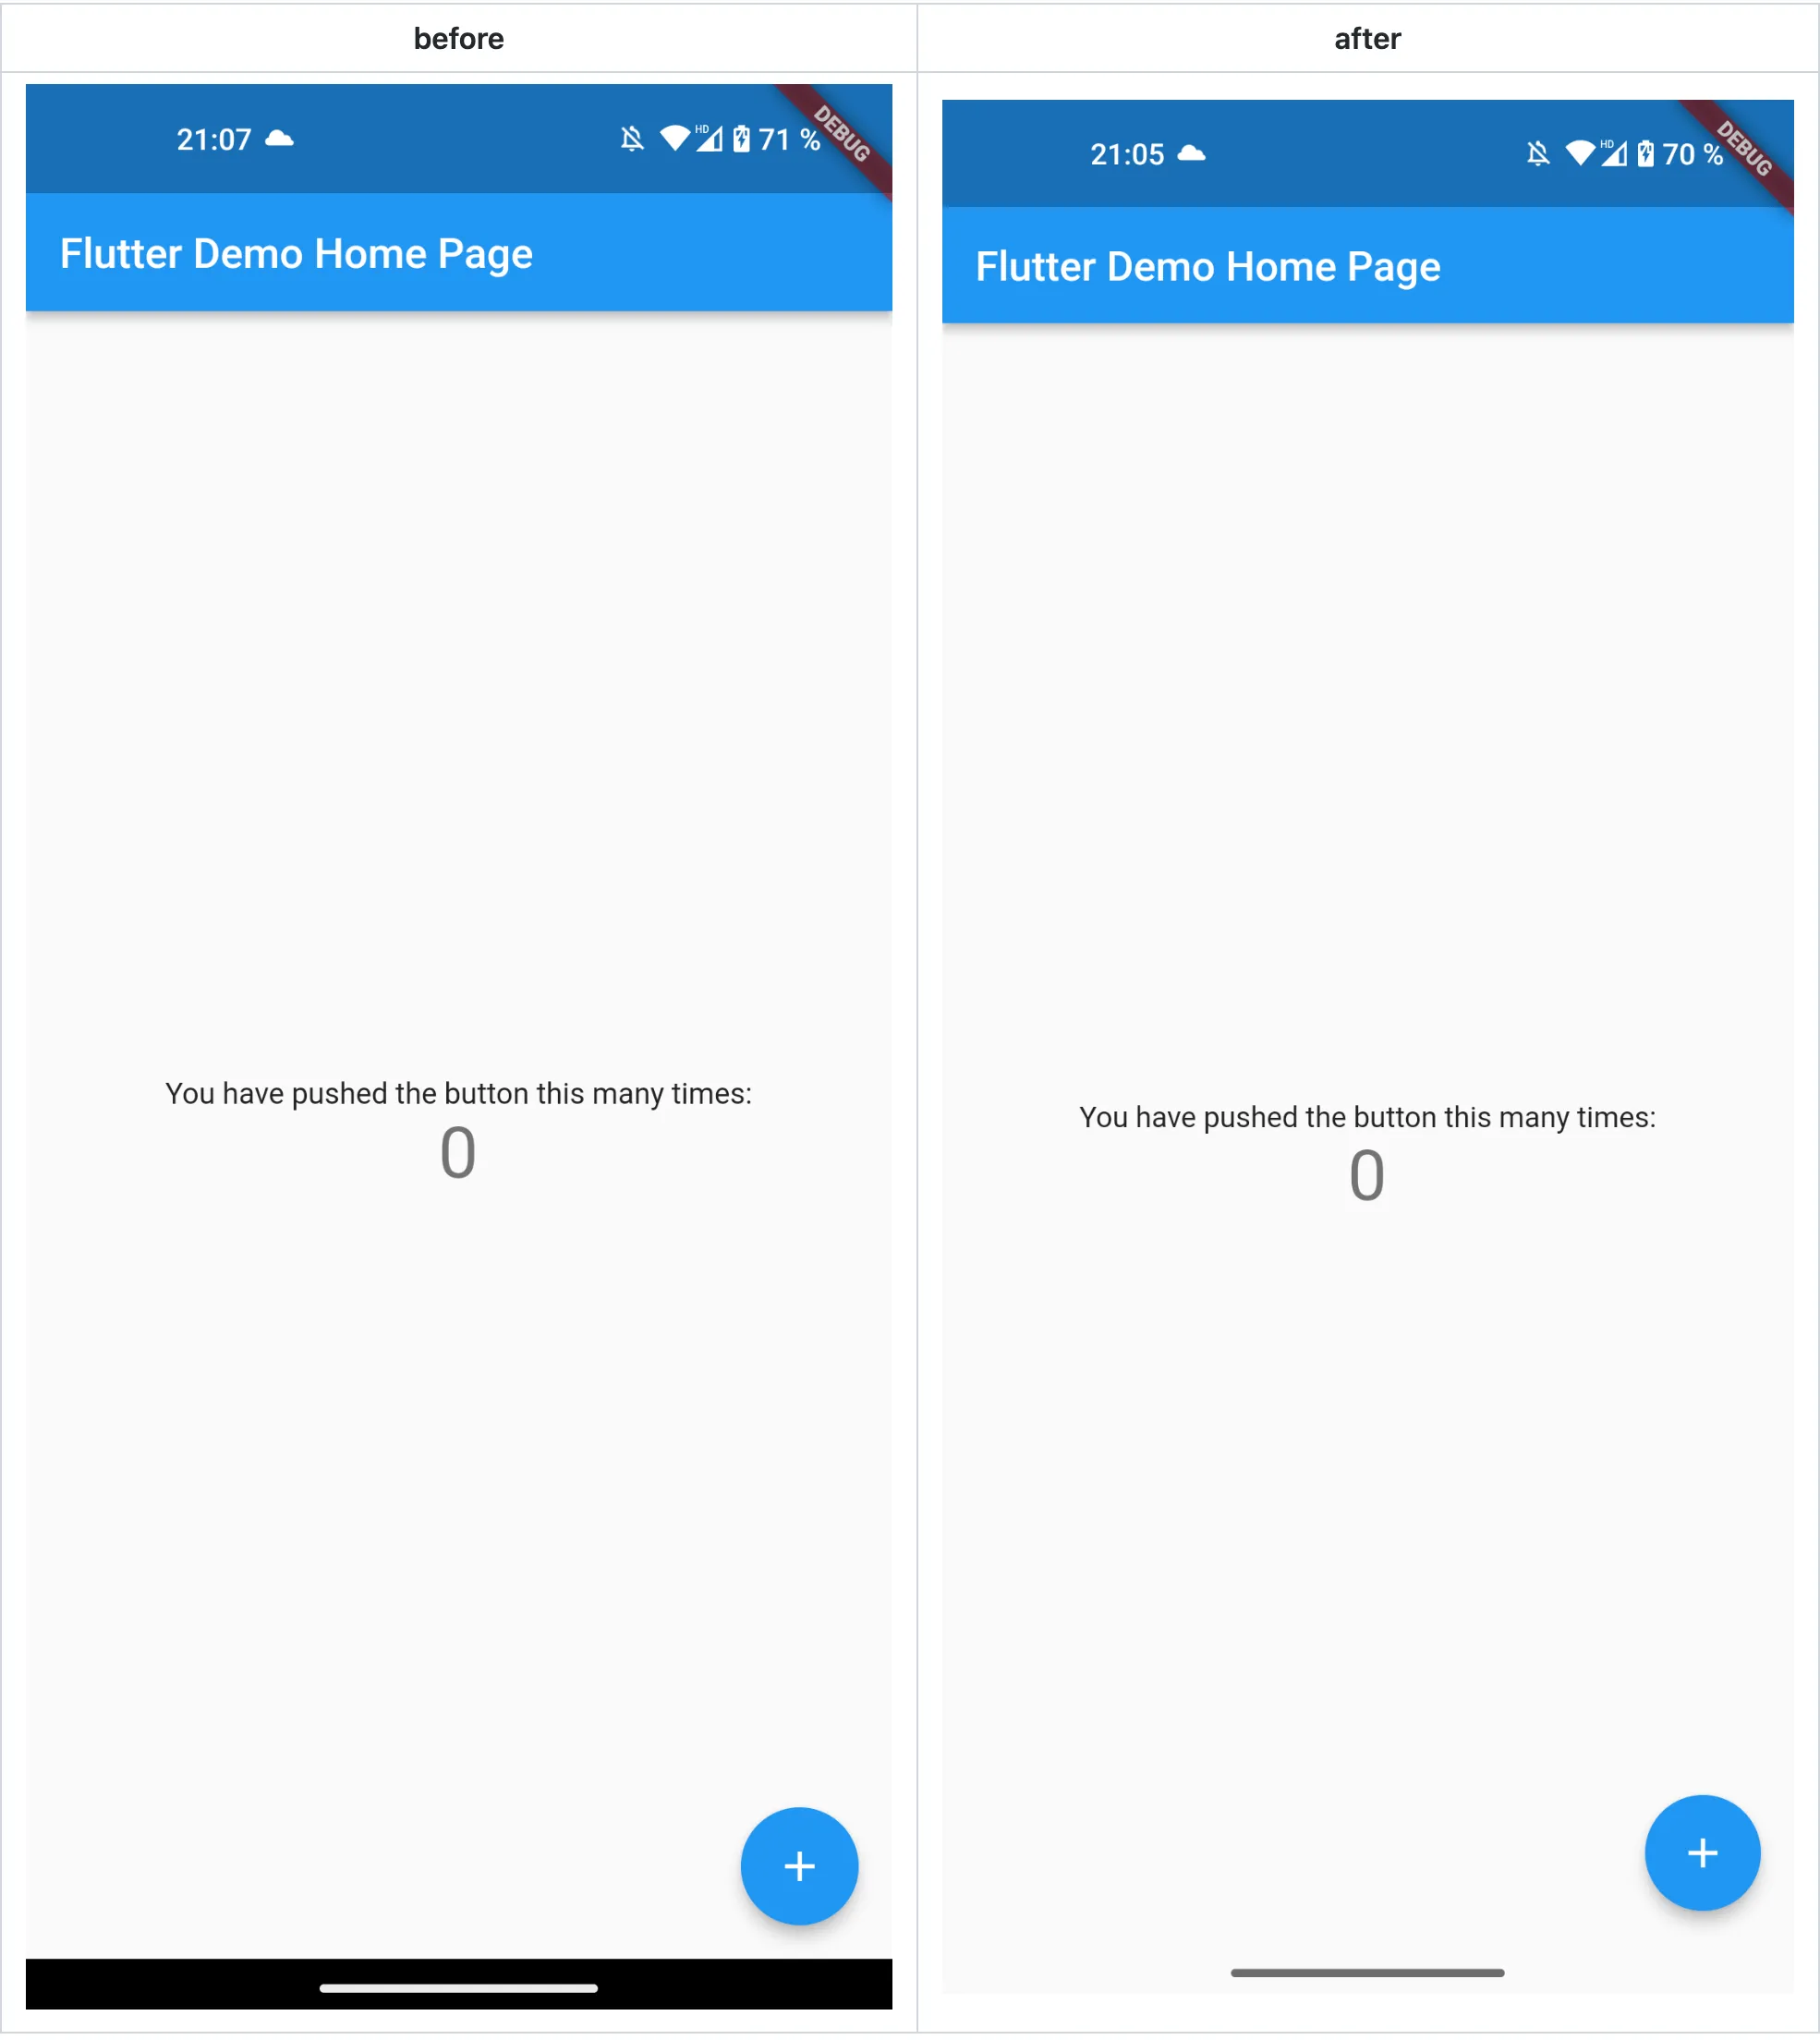
As you can see in the before screenshot, the app has an iOS-like swipe indicator on a black bar. By enabling the edge to edge mode, we also show content behind this indicator. In order to do this, you just change your code to the following:
Future<void> main() async {
  WidgetsFlutterBinding.ensureInitialized();
  SystemChrome.setSystemUIOverlayStyle(
    const SystemUiOverlayStyle(systemNavigationBarColor: Colors.transparent),
  );
  await SystemChrome.setEnabledSystemUIMode(SystemUiMode.edgeToEdge);
  runApp(const MyApp());
}
Please be aware, though, that this might cause issues on older Android versions. There’s also a Flutter issue to make this the default behavior for newly generated Flutter versions.
High refresh rate
Flutter apps are making use of high refresh rates by default on iOS. On Android, however, it isn’t that easy. Different manufactures mess with the system and can disable the automatic enabling of high refresh rate. One Plus, Oppo and Nothing for example do this. Xiaomi doesn’t. You can force a high refresh rates to a certain degree by using display_mode. Add the package as a dependency and change your code to the following:
Future<void> main() async {
  WidgetsFlutterBinding.ensureInitialized();
  await FlutterDisplayMode.setHighRefreshRate();

  runApp(const MyApp());
}
I hope this post was insightful for you!
You can follow me on the socials below.
Originally published on Medium.